Properly prepared concrete and application of coating is paramount to the longevity and quality of coating. Epic Concrete Coating team is highly trained, allowing us to complete most coating jobs in just one day!
Concrete varies in hardness, moisture content and structural condition. Each of these variables will contribute to how our team will approach your project. During your free consultation, our team will perform a moisture test and asses if your concrete needs repair work.
The first step we take to prepare your floor is grinding the concrete. This extends the life of the coating by providing the greatest possible adhesion. Mechanical grinding consists of using a 30” propane grinder and diamond wheel hand grinders. The diamonds allow us to achieve the desired profile.
To help fight the dust created by the mechanical grinding process, we utilize HEPA filtration vacuum systems. Each piece of grinding equipment is connected to its own vacuum. These vacuums keep airborne dust particles to a minimum

Living in the upper Midwest, our concrete can take a beating. Our team will use a polyurea mender material to repair any pits, cracks, and/or spalls that are present in the existing concrete floor.
We use a hand grinder with a diamond v-blade to open up and abrade both sides of the crack. By doing this, we gain additional surface area for better product adhesion.
We mix our mender material and overfill the crack. When the material is fully cured we grind the overfilled material flush with the concrete surface. This leaves the floor smooth and level.
All floor pits are prepped and grind using the v-chase blade to clean and remove weak concrete. This gives the damaged area a course profile for our repair material to bond to. Just like repairing a crack, we mix our mender material and overfill the pit.
When the material is fully cured (seven to ten minutes) we grind the overfilled material flush with the concrete surface. This will leave the floor smooth and level.
We prepare all spalled areas just like we repair pits. We use the grinder to remove all the deteriorated concrete. The remaining concrete is strong and ready for our repair material to bond to it.
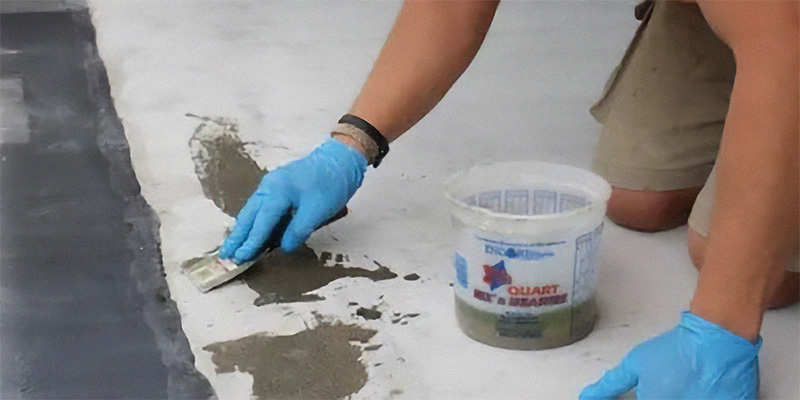
Depending on the severity of the spalling, we mix up a small to large batch of mender material and use a trowel/squeegee to pull the material into the spalled areas. Again, we over fill these areas to be able to grind them back down. This step may be repeated on floors with severe spalling.
When our material is fully cured (seven to ten minutes) we grind the overfilled material even with the concrete surface. We check to make sure that all the areas are level with the floor and refill any uneven areas.
We feel that it is best to leave all control joints open to allow for the movement of the concrete and relieve the stress. Although, control joints can be filled if specified.
The repair process is followed by vacuuming the floor and using a leaf blower to flush out any remaining debris.
Typically in garage floor applications we will apply a polyurea full chip coating system. Prior to coating the floor we will start with coating all vertical surfaces:
We start by mixing a small amount of our base coat, a 100% solids self-priming pure polyurea, which is used to cut in all the edges around the floor.
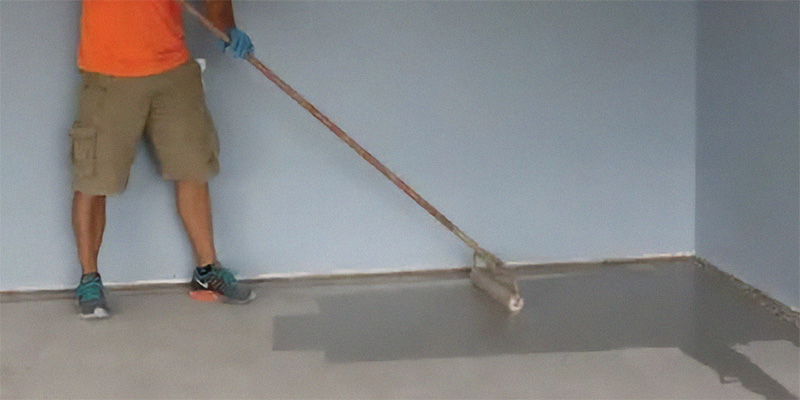
When the floor edges are cut in, we mix one gallon of base coat at a time and spread it out at a rate of approximately 285 sq. ft. This is achieved by pouring the mixed coating onto the floor in a line and using a roller/squeegee, to spread the material in an even manner to the desired thickness. We repeat the mixing and rolling process until the whole surface is covered completely.
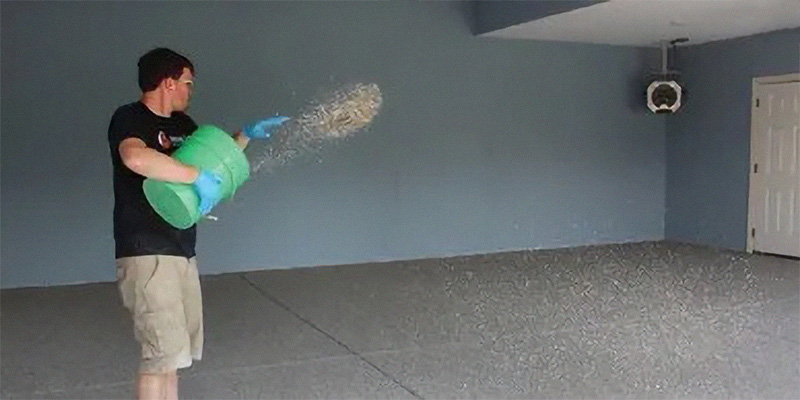
When the floor is coated completely, we mix our flake in a big tub to insure an even blend of colors. We then broadcast the flake into the wet coating by hand, covering the whole floor with the flakes. By using mass quantities of flakes, we ensure that the floor is completely covered, leaving it uniform in color and texture.

Once the scraping process is completed, we proceed to our final step, the application of our clear coat system. Our clearcoat is a high-quality, 93% solids, UV-stable, clear polyaspartic, applied using a squeegee and roller for optimal results.
Preparing the Edges: We start by mixing a small batch of our 93% solids Polyaspartic Topcoat. This is meticulously applied to cut in all the edges around the floor, ensuring a precise and clean finish.
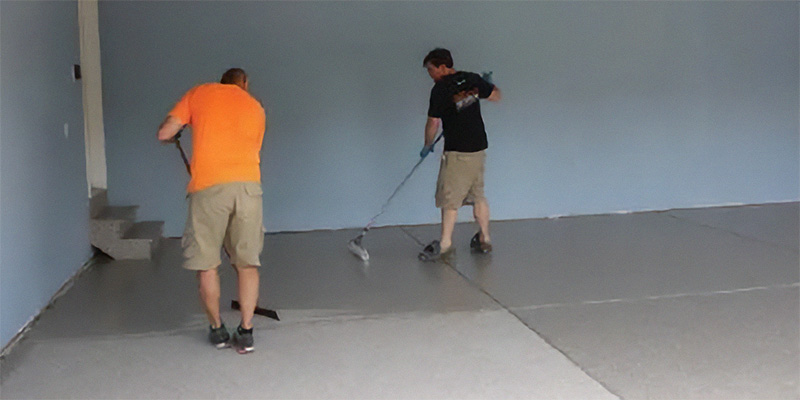
Applying the Topcoat: Next, we mix two gallons of Topcoat at a time. It’s spread at an approximate rate of 155 sq. ft. per gallon. We achieve this by pouring the mixed coating onto the floor in a line, then using a squeegee to evenly spread the material to the desired thickness.
Ensuring Even Coverage: The Topcoat is then rolled and backrolled to ensure even coverage, creating a uniformly smooth surface.
Quality and Durability: Our polyaspartic top coat is nonporous, significantly reducing the potential for staining and making it easy to clean. It’s designed to resist abrasion, chemicals, salt, gas, oil, grease, and environmental factors like mold, mildew, and bacteria.
Fill out form below for your floor coating cost estimate.
By providing a telephone number and submitting the form you are consenting to be contacted by SMS text message (our message frequency may vary). This site is protected by reCAPTCHA and the Google Privacy Policy and Terms of Service apply.